Setting up a Nano Reef

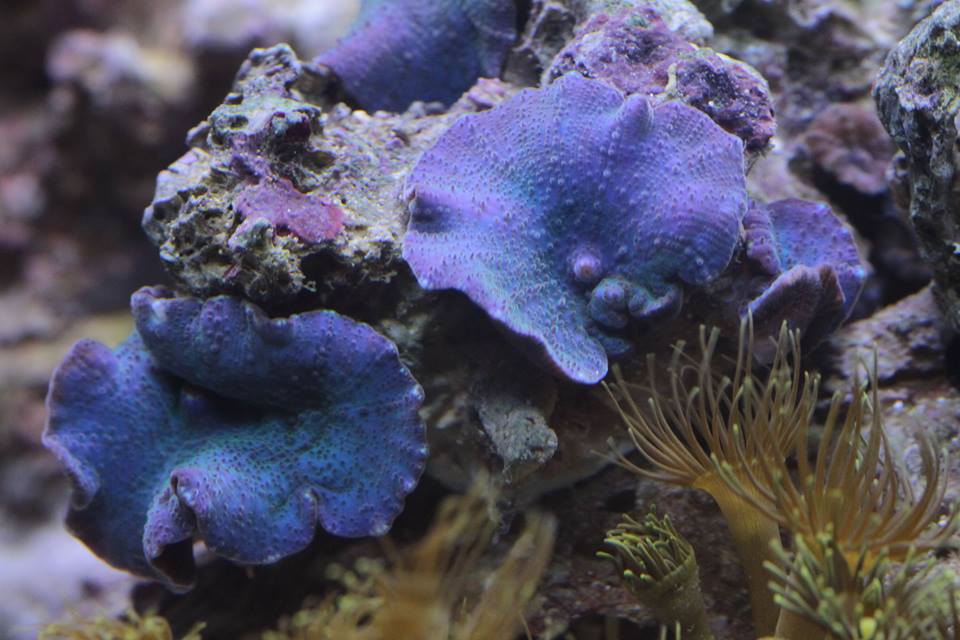
I have always wanted to get myself a reef aquarium… A complete ecosystem enclosed in a glass/acrylic tank with beautiful coral and interesting livestock…. The only question I ask myself now is “What took you so long?”

Dealing with space restraints can be an issue when setting up an aquarium. Nowadays a lot of Nano sized aquariums are available on the market and with some limitation to the selection of livestock/corals will allow you to set up a small marine environment.

I had to make a decision on whether I wanted a freshwater or marine aquarium – both of them have their pros and cons. Unable to decide I purchased both and decided to start of with the freshwater shrimp aquarium. A marine aquarium can be harder to maintain but rewards you with beautiful colors and very bizarre creatures…

Before I made the purchase I had some reading to do, so I took about six weeks and consumed any literature I could find on the topics. The requirements to successfully maintain an Aquarium (especially a Nano aquarium) boil down to a few facts:

– maintaining biological stability (water quality, waste): If you know basic chemistry and have some common sense the basics should not be a problem and small mistakes (and mistakes will be made) should not have a too ciritcal impact

– maintaining livestock: This is probably the most fun part in the process. Get the facts/data of your livestock and analyze their behavior. If you have an analytical mindset – be prepared to explore a whole new world with plenty of interesting stuff to learn. Questions like “What food do species x prefer” and “Do species x and y” get along and how can I scape my reef to give my corals a healthy environment will come up here.

– equipment choice: This is a large industry and products are flooding the market, find what works best for you and your livestock or better yet…. build it yourself… 🙂

With High Power LEDs, Micro controllers and compact computers like a Raspberry Pi will allow you to bring your tech experience into the whole aquarium spectrum.

Also, if you love photography (especially Macro Photography) you will love owning a reef tank.

Coming up will be a series of Blogs about setting up, maintaining, enjoying and improving my reef aquarium.

1016373_610025702371049_1405908262_n


Remove unofficial debian-multimedia.org repository from your sources

http://bits.debian.org/2013/06/remove-debian-multimedia.html

The unofficial third party repository Debian Multimedia stopped using the domain debian-multimedia.org some months ago. The domain expired and it is now registered again by someone unknown to Debian. (If we’re wrong on this point, please sent us an email so we can take over the domain! 😉 )

This means that the repository is no longer safe to use, and you should remove the related entries from your sources.list file.


A rare moment…

Read in a book, explanation of PEAP, the Protected Extensible Authentication Protocol:

This EAP method was developed in a rare moment of enlightened cooperation between Microsoft, Cisco and RSA Security

29c3 Recording Mirrors

Pasted from http://events.ccc.de/congress/2012/wiki/Documentation

These mirrors sync directly from the main FeM-mirror. If you want an fast download experience the usage of a BitTorrent client is recommended.

  • mirror.fem-net.de (6 machines in dns round robin, each connected with 1GE or 10GE, also reachable over ftp and sometimes rsync, dualstack)
  • mirror.netcologne.de (also reachable over ftp and rsync, 2x1GBit/sec, dualstack, part of mirror.fem-net.de)
  • ftp.ccc.de (4 machines in dns round robin, also reachable over ftp, dualstack)
  • webinterface with thumbnails: http://media.ccc.de/browse/congress/2012 will be available when all talks are ready
  • Experimental HTML5 congress video experience: http://video.events.ccc.de/
  • ftp.halifax.RWTH-Aachen.de (also reachable over ftp and rsync, 10 GBit/sec, German research network, IPv4 only)
  • 29c3.mirror.speedpartner.de (http only, 1 GBit/sec, dualstack)
  • Lab: Layer 3 Switching Pt.3 – Inter VLAN Routing with Switched Virtual Interfaces(SVI)

    With Switched Virtual Interfaces, a Layer 3 Switch can forward packets between networks on its own – no external Router required.

    Compared to a normal Router with FastEthernet or GigabitEthernet Interfaces, Layer 3 Switches using SVI can forward packets between VLANS at backplane speed! To get an idea how SVI works, take a look at this graphic:


    In this example we have 3 VLAN on the Layer 3 Switch: Vlan 20, 30 and 40. To be able to forward packets, IP Routing first needs to be enabled on a Layer 3 Switch:

    sw1(config)#ip routing

    As we need a gateway for each VLAN, we simply assign the gateway IP address to the equivalent VLAN Interface. Note that I left out the subnet mask in the image due to space restrictions. After that we put the VLAN interface online using the no shut command. You should see IP Addresses assigned to your VLAN Interfaces when using the sh ip int brief command.

    Once your VLAN Interfaces are up and running with an assigned IP Adress, your switch is ready to forward packets.

    Note: SVIs are also used to provide Layer 3 connectivity to a switch – for example if you want to access the switch via SSH or Telnet (seriously, do no use Telnet if you can use SSH).

    The advantages of using SVIs to forward packets between your VLANs compared to using a Router or Router on a Stick are pretty obvious: Speed and Port density.

    The disadvantage of this method is pretty obvious as well: It requires a Layer Switch such as the 3750 im using in my lab.


    Lab: Layer 3 Switching Pt.2 – Inter VLAN Routing with Router on a Stick


    With the Layer 3 Switch set up in Pt.1  it is time to look at some basic concepts of Layer 3 Switching. The Router on a Stick concept is technically not Layer 3 Switching since the Packet Forwarding (Routing) requires a Router.

    The basic concept of Router on a stick is implemented by creating subinterfaces on a single physical Router port. After the Switchport has been set to trunk mode (802.1q for you non-Cisco networkers), the subinterfaces can be assigned a VLAN by setting the trunk encapsulation to dot1q and a VLAN ID.


    This concept should work with any switch that supports VLANs. Another advantage of this concept is the fact that only one Router port is required in order to forward Layer 3 packets between the VLANs. The downsides however are a single point of failure and possible congestion (depending on the amount of VLANs and bandwidth utilization).

    Coming up next: Inter-VLAN Routing with Switched Virtual Interfaces (SVI) and Routed Ports which require Layer 3 switches.


    Lab: Layer 3 Switching Pt.1 – Preparing vor v6 requirements

    Preapring the Layer 3 Switch for v6

    Before setting up the Lab Switches for some basic Layer 3 functions I will upgrade the IOS Images to make sure I can use v6 in the Lab environment as well.

    3750-1#show boot
    BOOT path-list : flash:c3750-ipbase-mz.122-25.SEB4/c3750-ipbase-mz.122-25.SEB4.bin

    Since the 3750 is currently running an IP-Base Image I will neet to upgrade it to a IP-Services Image to be able to use advanced Layer 3 functions for v6 routing. In the BASE Versions of the 3750, only Staic v6 and RipNG are available.
    So I grabbed the newest 3750 Image from the Cisco Web Page (requires a Login Account, but a Guest Account will suffice for the 3750 Image). Another benefit of an IOS Upgrade will be some improved security, since the current Image lacks some crypto functionality. This means no SSH – the lack of HTTPS can be neglected since we dont enable the http or the secure-server(https) on the device. The K6 tag in an Image name references to crypto features such as SSH some make sure your production equiptment supports it.
    Since the Flash space was insufficient to store both the IP-BASE and IP-SERVICES Image I will have to delete the current IOS which can be done while the switch is running since the IOS image is in the RAM.
    Make sure to back up your current IOS image to a TFTP server just in case.

    3750-1#del /force /recursive c3750-ipbase-mz.122-25.SEB4#

    The /force and /recursive options will delete the complete Image directory as well as bypass any confirmations on deleting files. You will want to use this feature in case you did in fact have the Webinterface set up since it will ask for confirmation on a huge amount of files.

    #copy tftp://10.1.1.1:/c3750-ipservicesk9-mz.122-55.SE6.bin flash:/
    Loading c3750-ipservicesk9-mz.122-55.SE6.bin from 10.1.1.1 (via Vlan123): !!!!!!!!!!!

    Now would be a good time to grab a cup of coffee. Once this is done, we will boot the new image from global config mode:

    3750-1(config)#boot system switch all c3750-ipservicesk9-mz.122-55.SE6.bin and reload from enable mode to boot into the new IOS image.

    In the next part of the Lab, I will demonstrate Inter-VLAN-Routing using a trunk connection to a router (Router on a Stick) and Switch Virtual Interfaces (SVIs)